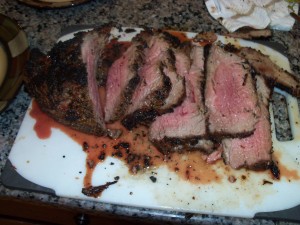
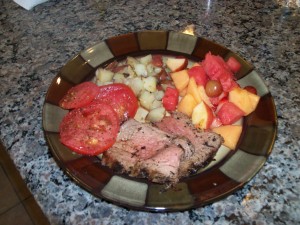
After several successful attempts, I believe that I’ve got the technique for grilling a nice and juicy and tender tri-tip. Just ask the family, who have participated (and approved) in this series of experiences. But first, a word about what a ‘tri-tip’ is:
The tri-tip is a cut of beef from the bottom sirloin primal cut. It is a small triangular muscle, usually 1.5 to 2.5 lbs. (675 to 1,150g) per side of beef. In the United States, this cut was typically used for ground beef or sliced into steaks until the late 1950s, when it became a local specialty in Santa Maria, California, rubbed with salt, pepper, garlic salt, and other seasonings, cooked over red oak wood and roasted whole on a rotisserie, smoked in a pit, baked in an oven, grilled, or braised by putting a pot on top of a grill, browning the meat directly on the grill surface before and after the braising. (The tri-tip is still often labeled the “Santa Maria steak”.) Most popular in the Central Coast of California and Central Valley regions of California, it has begun to enjoy increasing popularity elsewhere for its full flavor, lower fat content, and comparatively lower cost. (Wikipedia)
I based my procedure on one found at one of the sites on FoodieFeeds (I can’t recall which one), and modified it a bit. But here’s the technique.
First, get a nice tri-tip from your local butcher. It’s not often found in some area’s grocery stores, so you may need to go to an independent butcher shop. The size depends on how many people you will be serving; to allow for ‘seconds’ (which will be required), figure on about 3 people per pound. Since we were having six adults and 5 children (under 10), we decided to get a 4 1/2 pounder for today’s dinner.
Pick up some of your favorite steak ‘rub’. I used the McCormick Grill-Mates Steak Rub, plus some McCormick Grill-Mates Montreal Steak Seasoning. That’s all you need to prepare the meat.
Sprinkle the rub generously on the tri-tip, patting it into the meat’s surface. Cover all surfaces of the tri-tip. Then wrap it in two layers of plastic wrap, then let it sit in the refrigerator overnight (about 24 hours). You can also use your favorite dry marinade. The key seems to be to let it sit at least 24 hours.
For timing, figure on 3 1/2 to 4 hours of cooking time. So one hour before mealtime, take the tri-tip out of the refrigerator and let it sit on the kitchen counter to get closer to room temperature. Sprinkle it with some more rub on all sides while it is out on the counter.
Set up your grill for indirect heat at about 225 degrees (F). On my four-burner gas grill, I set up one burner at almost the lowest temperature. When the temp is at 225, put the tri-tip on the other side of the grill (not over the hot burners). It doesn’t seem to matter which side of the tri-tip is facing down, but I like to put it fat-side up.
Now, let the tri-tip cook in the indirect heat (with the grill cover on), making sure the grill temperature stays around 225 F until the internal temp of the tri-tip (in the middle of the thickest part of the cut) gets to 120-125 degrees (F). This part of the process will take about 2 hours.
Next, fire up the grill to a temp of about 400-450. Move the tri-tip over the heated part of the grill, and sear the tri-tip. Flip the tri-tip so that both sides are seared. Cook until the internal temp is 145 degrees F. This should take 20-30 minutes. (After searing both side, move the tri-tip over to indirect heat, but keep the temp around 450. This helps keep the tri-tip cooking without over-searing the outside.)
When the tri-tip is at 145 F, remove it from the grill onto a plate. Bring it inside, and set it on the counter and cover it loosely with foil. Leave it alone for at least 15 minutes. This is to let the meat ‘rest’, and helps keep it tender and juicy. After it has rested, you can cut it vertically from the widest end to the narrowest.
Here’s the result: a juicy, tender, flavorful grilled tri-tip.
And that’s how you can do it too!


